
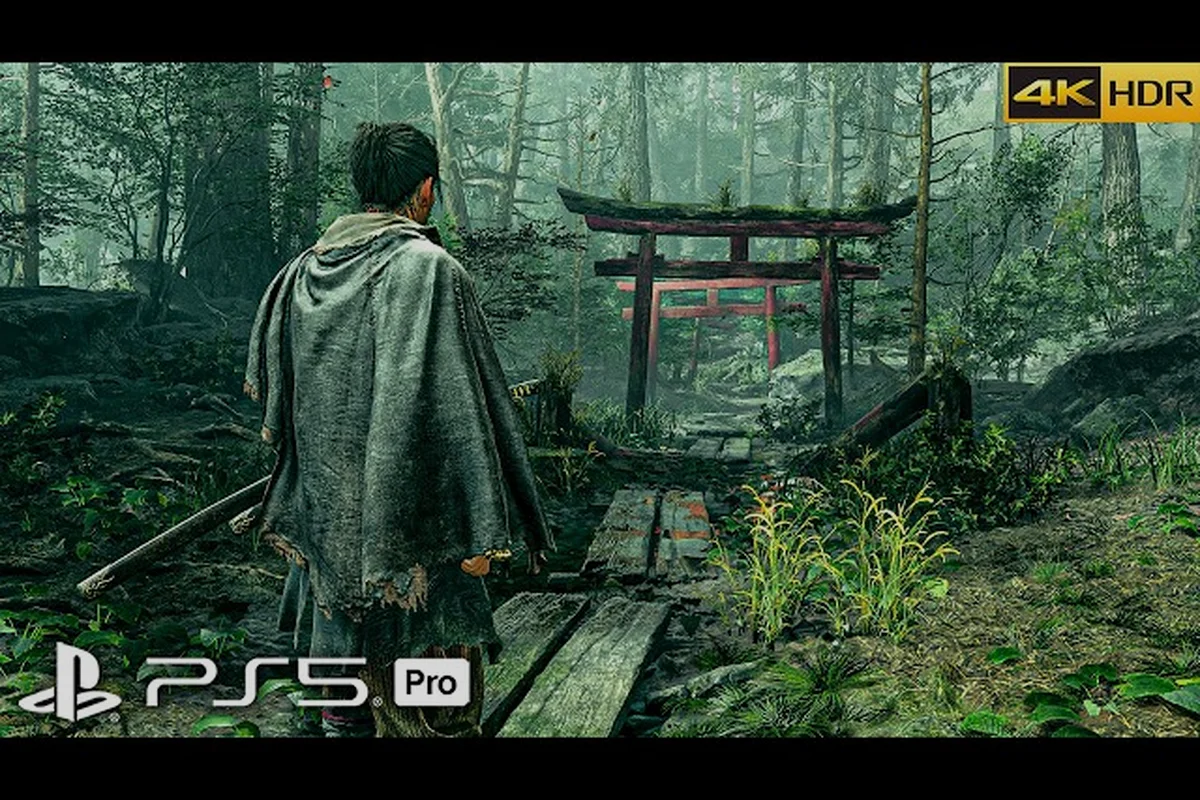
Kyoto burns under the Genma onslaught, and the twisted capital hides more than demons behind its paper walls — it hides puzzles that gate your progression. This Onimusha: Way of the Sword puzzle guide breaks down every riddle, mechanism, and locked door you will encounter, so you never waste a single soul on trial and error. Because the game interweaves combat with environmental brain-teasers, understanding how each puzzle works matters just as much as mastering the Issen counter. Get ready to unlock every secret the city keeps, from the first sliding block to the final sigil sequence.
How Onimusha: Way of the Sword Puzzles Work
The puzzle design in Way of the Sword leans heavily on environmental storytelling, where each district of Kyoto presents a distinct mechanical theme rather than repeating the same switch-and-door formula. You will find that most puzzles tie directly into the Eye, Arm, and Leg Awakenings — the three upgrade paths that expand what Musashi can interact with in the world. The official Capcom site confirms that these awakenings unlock hidden paths, obstacle smashing, and new abilities, which means many solutions become available only after you invest in the right upgrade branch.
Before you start solving anything, you need to understand the core interaction rules that govern every puzzle in the game:
-
Eye Awakening reveals hidden glyphs and invisible platforms, essential for progression puzzles that hide their mechanics in plain sight.
-
Arm Awakening lets you pull levers from a distance and rotate large mechanisms, which opens up a second layer of puzzle design.
-
Leg Awakening grants the ability to smash through cracked walls and perform charged ground slams that activate pressure plates.
-
Soul Orbs act as the universal currency for puzzle activation, and some mechanisms consume them permanently, so budget carefully.
The key insight is that puzzle difficulty scales with district progression, and the game introduces new mechanics gradually rather than dumping everything at once. Early puzzles in the Rokujo district teach you single-mechanic interactions, while later areas like the Imperial Palace combine all three awakening types into multi-stage sequences. According to community reports on the r/Onimusha subreddit, most players get stuck not because the solutions are obscure, but because they miss the environmental cues that indicate which awakening to use. Look for glowing seams on walls, unusual color patterns on floors, and small wind currents that hint at hidden passages.
All Main Story Puzzle Solutions
The main story contains roughly a dozen mandatory puzzles that block your path to each boss encounter, and knowing the exact solution saves you from wandering the same corridor for an hour. Below is the complete breakdown of every story-critical puzzle, organized by district so you can jump straight to the section you need. Remember that some puzzles have randomized elements, but the core logic remains consistent across playthroughs.
Rokujo District: The Sliding Gate Mechanism
The first real puzzle appears after you clear the initial Genma ambush in the Rokujo district, where a massive stone gate blocks the path to the eastern temple grounds. You need to slide three stone blocks into their correct positions, but the catch is that each block moves on a different axis and resets if you leave the room. The solution requires you to push the left block forward twice, then the center block right once, and finally the right block backward once to complete the pattern.
| Step | Action | Result |
|---|---|---|
| 1 | Push left block forward twice | Aligns it with the first groove |
| 2 | Push center block right once | Connects the middle track |
| 3 | Push right block backward once | Completes the gate mechanism |
| 4 | Interact with the central seal | Gate opens permanently |
The trick here is that the center block only moves after the left block is locked into place, so attempting to push it early wastes time. Once the gate opens, you will find a Genma Talisman on a small altar inside, which is a key item for a later side quest. If you miss this item, you will need to backtrack after the district boss, so grab it before moving forward.
Gion District: The Lantern Reflection Puzzle
The Gion entertainment district presents a more cerebral challenge where you must align three hanging lanterns to cast a specific shadow pattern on the back wall. Each lantern rotates on a fixed axis, and the shadow they cast reveals a three-character sequence that opens the hidden door to the geisha house basement. The correct rotation order is left lantern twice, center lantern three times, right lantern once, which aligns all three beams into a single converging point.
| Lantern | Rotations | Shadow Result |
|---|---|---|
| Left | 2 clockwise | Projects the first character |
| Center | 3 clockwise | Projects the second character |
| Right | 1 counterclockwise | Projects the third character |
Players who rush this puzzle often rotate the right lantern clockwise instead of counterclockwise, which breaks the alignment and forces a reset. The shadow sequence also reveals a hidden compartment in the floor that contains a Demonite Shard, a crafting material you cannot find anywhere else in this district. Take note that the lanterns stay aligned after you open the door, so you can return to farm the shard if you need more for upgrades.
Imperial Palace: The Four Seals Puzzle
The Imperial Palace houses the most complex mandatory puzzle in the game, requiring you to activate four elemental seals in a specific order while fighting off respawning Genma. Each seal corresponds to an element — Fire, Water, Wind, and Earth — and the order is hinted at by the murals on the surrounding pillars. The correct sequence is Fire, then Water, then Wind, then Earth, which mirrors the creation myth depicted in the palace murals.
| Seal | Element | Location | Activation Method |
|---|---|---|---|
| 1 | Fire | East corridor | Use Arm Awakening on the brazier |
| 2 | Water | West courtyard | Smash the cracked fountain with Leg Awakening |
| 3 | Wind | North tower | Reveal the glyph with Eye Awakening |
| 4 | Earth | Central hall | Insert the Genma Talisman from Rokujo |
The Genma Talisman from Rokujo is mandatory here, which is why backtracking is such a common complaint among players who skipped it earlier. Each seal activation triggers a wave of enemies, so prepare your Issen timing before you start the sequence. If you die mid-sequence, the seals reset, but the murals remain readable, so you only need to redo the activations, not the exploration.
Side Quest Puzzle Walkthroughs
Beyond the main story, Kyoto hides numerous optional puzzles tied to side quests, and completing them rewards you with rare upgrade materials and exclusive equipment. These puzzles are entirely missable, so this Onimusha: Way of the Sword side quest walkthrough section ensures you catch every one of them before the story locks you out of certain districts. The side quests become available at different points in the story, and some require specific awakening upgrades that you might not have yet.
The Missing Merchant: Hidden Basement Puzzle
The Missing Merchant side quest starts in the Rokujo marketplace after you speak with a distraught shopkeeper whose partner vanished into a basement that only appears at night. The basement entrance is hidden behind a false wall that requires the Eye Awakening to reveal, and inside you will find a rotating cylinder puzzle with six symbols. The solution is to align the symbols to match the pattern on the merchant's ledger, which you find on a desk in the corner of the room.
| Symbol | Position | Ledger Match |
|---|---|---|
| Crane | Top | Yes |
| Tortoise | Bottom | Yes |
| Dragon | Left | No — rotate once |
| Phoenix | Right | No — rotate twice |
| Serpent | Center | Yes |
| Tiger | Middle-left | No — rotate three times |
The correct final arrangement reads Crane-Tiger-Serpent-Dragon-Phoenix-Tortoise in clockwise order, which unlocks the merchant's safe containing the Golden Ingot quest item. The merchant rewards you with a unique katana skin and 500 souls upon completion, making this side quest well worth the effort. Community testing suggests that the cylinder puzzle pattern is fixed across all playthroughs, so you can memorize this solution for future runs.
The Cursed Shrine: Offering Sequence
The Cursed Shrine side quest requires you to make offerings at five small shrines scattered across the Gion district, but each shrine demands a specific item type. The puzzle here is figuring out which offering goes where, since the shrines do not label their requirements and the wrong offering triggers a Genma ambush. The correct sequence, based on the shrine carvings, is soul orb at the first shrine, herb at the second, antidote at the third, talisman at the fourth, and a weapon at the fifth.
| Shrine | Offering | Reward |
|---|---|---|
| First | 100 souls | Small soul crystal |
| Second | Medicinal herb | Health recovery item |
| Third | Antidote | Poison resistance charm |
| Fourth | Purification talisman | Blessing buff (10 minutes) |
| Fifth | Any weapon | Cursed Katana (unique) |
The Cursed Katana you receive from the fifth shrine is a high-risk, high-reward weapon that drains your health with each swing but deals massive damage. This makes it a favorite among experienced players who have mastered the Issen counter and can avoid taking hits consistently. If you are still learning combat fundamentals, check out the gameplay guide for tips on timing your parries and building the stamina management habits this weapon demands.
The Underground Vault: Pressure Plate Combination
The Underground Vault becomes accessible after you obtain the Leg Awakening, and it contains a pressure plate puzzle that requires precise timing rather than just correct placement. The vault floor has nine plates arranged in a 3x3 grid, and you must step on them in a specific order to open the central vault door. The correct sequence, which you can deduce from the crack patterns on the floor, is center, top-left, bottom-right, middle-right, top-right, bottom-left, middle-left, top-center, bottom-center.
| Step | Plate | Direction |
|---|---|---|
| 1 | Center | Start |
| 2 | Top-left | Diagonal up-left |
| 3 | Bottom-right | Diagonal down-right |
| 4 | Middle-right | Horizontal right |
| 5 | Top-right | Diagonal up-right |
| 6 | Bottom-left | Diagonal down-left |
| 7 | Middle-left | Horizontal left |
| 8 | Top-center | Vertical up |
| 9 | Bottom-center | Vertical down |
The vault contains the Oni Gauntlet, a powerful accessory that increases your soul absorption rate by 25 percent, which accelerates all your upgrade progression. This makes the vault puzzle one of the highest-value optional activities in the game, especially if you plan to tackle the harder difficulty modes. If you are planning a second playthrough, the New Game Plus guide explains how this accessory carries over and stacks with other soul-boosting equipment.
Puzzle Mechanics and Hidden Secrets
Understanding the underlying mechanics of puzzle design in Way of the Sword helps you solve new puzzles faster, even ones you have never seen before. The game follows consistent logic patterns, and once you recognize them, most puzzles become intuitive rather than frustrating. This section covers the hidden mechanics that the game never explicitly teaches you, based on community testing and data mining efforts.
The Three Awakening Types and Their Puzzle Roles
Each awakening type serves a distinct puzzle role, and the game expects you to switch between them fluidly as you explore. The Eye Awakening is primarily for discovery — it reveals hidden glyphs, invisible platforms, and secret passages that are otherwise invisible to the naked eye. The Arm Awakening handles manipulation — pulling distant levers, rotating mechanisms, and interacting with objects that are out of reach. The Leg Awakening deals with destruction — smashing cracked walls, triggering pressure plates, and breaking through obstacles that block your path.
| Awakening | Primary Puzzle Role | Secondary Role | Upgrade Priority |
|---|---|---|---|
| Eye | Reveal hidden elements | Detect traps | High |
| Arm | Manipulate distant objects | Rotate mechanisms | Medium |
| Leg | Destroy obstacles | Activate plates | Medium |
The upgrade priority matters because some puzzles remain unsolvable until you invest enough souls into the corresponding awakening tree. According to the official system description, each awakening also provides combat benefits — the Eye enhances your parry window, the Arm increases throw damage, and the Leg boosts your dodge speed. This means you are never wasting souls on puzzle-only upgrades, since every awakening also strengthens your combat capabilities.
Environmental Cues That Solve Puzzles
Way of the Sword uses subtle environmental cues to guide you toward puzzle solutions without holding your hand, and learning to read these cues cuts your solve time dramatically. Glowing seams on walls indicate breakable surfaces that require the Leg Awakening, while faint blue glyphs on floors or pillars mark interaction points for the Eye Awakening. Wind currents that do not match the ambient weather pattern usually point toward hidden passages or ventilation routes.
-
Color coding: Red-tinted objects respond to the Arm Awakening, while green-tinted objects respond to the Leg Awakening.
-
Sound cues: A faint chime plays when you are near a hidden puzzle element, and the pitch rises as you get closer.
-
Shadow patterns: Puzzles involving light and shadow always have a visual reference in the room, often a mural or painting.
-
Enemy placement: Genma patrol routes often circle around puzzle-relevant objects, hinting at their importance.
The sound cue mechanic is particularly useful in the Imperial Palace, where several hidden seals are completely invisible even with the Eye Awakening active. Walking near the correct wall triggers a subtle chime that tells you to activate the Eye Awakening and look for the glyph. Community reports indicate that this audio cue was added in a late development build specifically to reduce player frustration, and it has been well received by the community.
Advanced Puzzle Strategies and Optimization
Once you understand the basics, you can optimize your puzzle-solving approach to save time and maximize rewards, especially if you are aiming for 100 percent completion. This Onimusha: Way of the Sword puzzle guide would be incomplete without covering the advanced strategies that speedrunners and completionists use to clear puzzles efficiently. These techniques require practice, but they dramatically reduce the time you spend stuck on environmental challenges.
Speedrun Techniques for Puzzle Sections
Speedrunners have developed several techniques to bypass or accelerate puzzle sections, and while some rely on glitches, most are legitimate optimization strategies. The most important technique is learning the exact camera angles that reveal puzzle solutions instantly, since many puzzles have a camera position that shows the full solution from the start. For example, the Gion lantern puzzle has a camera angle near the back wall that shows all three shadow positions simultaneously, letting you solve it in one pass.
| Technique | Difficulty | Time Saved | Risk |
|---|---|---|---|
| Camera angle abuse | Easy | 30-60 seconds | None |
| Awakening pre-activation | Medium | 15-30 seconds | Low |
| Enemy skip | Hard | 1-2 minutes | High |
| Glitch clipping | Very Hard | 2-5 minutes | Save corruption |
The awakening pre-activation technique involves activating your Eye or Arm awakening before entering a puzzle room, so the solution elements are already visible when you arrive. This works because the game does not reset your awakening state when you cross room boundaries, and it saves you the activation animation time. The enemy skip technique is riskier — it involves using the Issen counter to instantly kill enemies before they trigger the puzzle reset mechanic, which requires precise timing and is not recommended for casual play.
Completionist Checklist for All Puzzle Rewards
If you are aiming for 100 percent completion, you need to track every puzzle reward carefully, since some are permanently missable if you progress too far. The most commonly missed reward is the Oni Gauntlet from the Underground Vault, which requires the Leg Awakening that some players delay upgrading until late game. The second most missed is the Cursed Katana from the Cursed Shrine side quest, which requires you to sacrifice a weapon that you might want to keep for combat.
| Puzzle | Reward | Missable | Required Awakening |
|---|---|---|---|
| Sliding Gate | Genma Talisman | No | None |
| Lantern Reflection | Demonite Shard | Yes | Eye |
| Four Seals | Palace Key | No | All three |
| Missing Merchant | Golden Ingot | Yes | Eye |
| Cursed Shrine | Cursed Katana | Yes | None |
| Underground Vault | Oni Gauntlet | Yes | Leg |
The missable puzzles are tied to district progression, and once you defeat the district boss, certain side quests become unavailable. The Cursed Shrine quest, for example, cannot be started after you clear the Gion district boss, so complete it before that fight. If you are following a completionist route, the Kyoto map guide provides a district-by-district breakdown of every puzzle location and its availability window, which helps you plan your route efficiently.
Frequently Asked Questions
What is the hardest puzzle in Onimusha: Way of the Sword?
The Four Seals puzzle in the Imperial Palace is widely considered the hardest because it combines all three awakening types with enemy waves and a strict sequence. The Genma Talisman requirement from the Rokujo district also punishes players who skipped optional content, forcing a long backtrack if they missed it.
Do puzzles reset if I die during combat?
Yes, most puzzles reset if you die during a combat encounter that triggers while solving them. The Four Seals puzzle is the most punishing example, as all four seals deactivate when you die, though the mural hints remain readable. You only need to redo the activations, not re-explore the area, so the reset is manageable.
Can I skip puzzles and come back later?
Some puzzles are permanently missable if you progress past a certain story point, particularly side quest puzzles tied to specific districts. The Underground Vault and Cursed Shrine puzzles become inaccessible after their respective district bosses are defeated. Main story puzzles, however, can always be revisited until you complete the final chapter.
Are puzzle solutions the same on every playthrough?
Most puzzle solutions are fixed and identical across playthroughs, including the lantern reflection and pressure plate sequences. The only randomized element is the enemy wave composition during combat-integrated puzzles, which does not affect the solution itself. This makes memorization a viable strategy for repeat playthroughs.
What happens if I miss a puzzle reward?
Missing a puzzle reward locks that item out for the current playthrough, but New Game Plus carries over most acquired gear. Prioritize the Oni Gauntlet and Cursed Katana for NG+ runs, as they unlock hidden paths and bonus souls. Consult the New Game Plus guide for full carry-over details.