
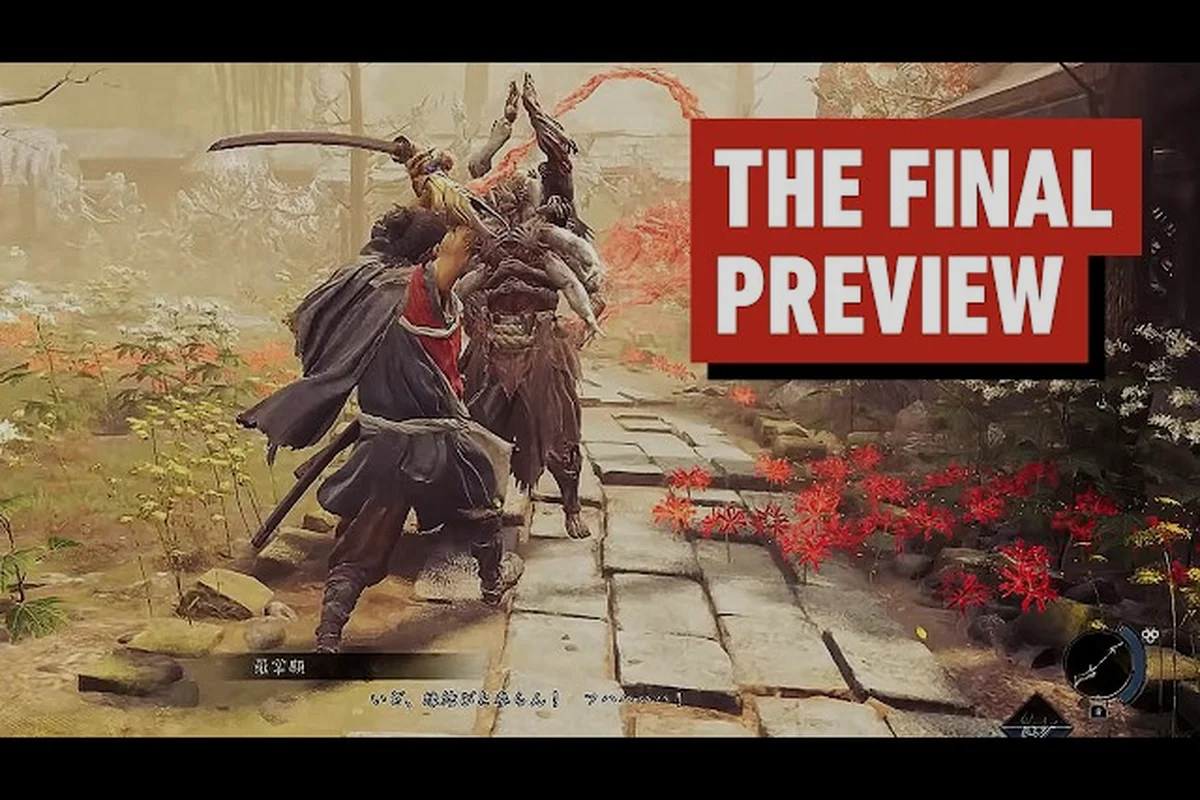
The Onimusha: Way of the Sword best order to do things matters more than raw skill because the game's stamina-driven combat and linear-with-open-areas structure punish players who wander into high-tier zones before their Rikido posture breaks are reliable. Getting the sequence wrong means burning through healing items on early Genma patrols, then entering boss fights with a depleted kit. This guide ranks the first ten hours into a clear priority chain so you can build momentum, unlock Eye, Arm, and Leg Awakenings at the right pace, and reach Sasaki Ganryu's rivalry arc without grinding. We also cover survival fundamentals, combat tips, and the upgrade order that keeps Musashi viable from the Edo-period streets of Kyoto to the final gauntlet confrontation.
The Best Order to Do Things in the Opening Hours
Your first session in Onimusha: Way of the Sword should follow a strict sequence because the game hands you new systems gradually, and each one compounds on the last. According to the official Capcom site, the core loop revolves around breaking an enemy's Rikido posture to trigger the Issen counter, which instantly executes weaker foes and deals massive damage to bosses. That means your early priority is learning to parry, not farming souls.
Here is the recommended order for the first five hours:
-
Complete the tutorial gauntlet without skipping dialogue — the game teaches the guard stance, parry timing, and stamina management through scripted encounters that escalate difficulty gradually.
-
Unlock the first Arm Awakening before exploring side alleys — this ability lets you smash obstacles and reach hidden paths that contain upgrade materials and consumables.
-
Spend your first souls on stamina upgrades, not raw attack power — because every parry and strike drains stamina, and running dry mid-combo leaves you vulnerable to the Genma's counterattacks.
-
Defeat the first mini-boss in the main story path — this encounter rewards you with a new sword type that changes your moveset, and it also opens the door to the Ki-en State, which triggers after chaining consecutive parries.
-
Return to the hub area to test the Break Issen mechanic — this dismembers standard enemies for bonus souls, while against bosses it trades between massive damage or extra soul drops, so you need to know when to use which option.
The reason this order works is that each step feeds the next. The Arm Awakening gives you access to more exploration routes, which means more upgrade materials, which means your stamina pool grows before you face the first major boss. Skipping ahead to explore the open areas too early, as many players report on the r/Onimusha subreddit, results in encounters with enemies whose Rikido breaks require three or four parries you cannot yet sustain.
Combat Priorities: Parry, Break, and the Issen Window
The Onimusha: Way of the Sword tips for combat all circle back to one truth: the Issen counter is your highest-damage tool, but it only works when you understand the posture system. The game uses a third-person perspective where Musashi can strike, parry, or deflect projectiles, and a prolonged parry lets you steer an enemy's fall direction, which sets up environmental kills and crowd control. The guard stance blocks attacks from all directions, but it drains stamina, so you cannot turtle forever.
Understanding the Rikido Posture Break
Every enemy has a hidden posture meter called Rikido, and when you deplete it through parries and well-timed strikes, the enemy enters a stunned state. This is your window to trigger the Issen counter, which instantly executes standard foes. The official site confirms that Break Issen, the enhanced version, dismembers enemies or offers bonus souls on bosses, making it the best risk-reward trade in the game.
| Mechanic | Stamina Cost | Effect on Standard Enemies | Effect on Bosses |
|---|---|---|---|
| Basic Parry | Low | Staggers enemy, small posture damage | Builds Ki-en State meter |
| Prolonged Parry | Medium | Steers fall direction, wall splat | Longer stun window |
| Issen Counter | None (timing-based) | Instant execution | Massive damage |
| Break Issen | None (timing-based) | Dismemberment, bonus souls | Trade: damage or extra souls |
| Guard Stance | Drains over time | Blocks all directions | Blocks all directions |
The table above shows why the best order to do things in combat is to master the basic parry first, then the prolonged parry, then the Issen execution. Jumping straight for Break Issen without understanding the timing means you will whiff the counter window and eat a full combo from the enemy you tried to execute.
Chaining Parries into the Ki-en State
Consecutive parries and dodges grant combat buffs that stack, and entering the Ki-en State changes your offensive options significantly. Community testing suggests that three consecutive parries without taking a hit triggers the state, which increases attack speed and reduces stamina drain for a short window. This is the moment to unleash your heaviest combos, because the buff window is short and the damage multiplier is substantial.
The practical takeaway is that the Onimusha: Way of the Sword best order to do things in any encounter is: parry twice to build posture damage, then parry a third time to enter Ki-en State, then unleash a full combo while the buff is active. This sequence works on both standard enemies and bosses, though the timing windows are tighter on the latter. If you want to dig deeper into the full combat system, the combat mechanics guide breaks down every input and its frame data.
Upgrade Order: Which Awakenings to Prioritize
The Eye, Arm, and Leg Awakenings are the three upgrade trees that define Musashi's capabilities, and the order you unlock them changes how the game plays. The official site describes these as unlocking hidden paths, obstacle smashing, and new abilities respectively, but the real value is in how they interact with exploration and combat.
The Arm Awakening First
The Arm Awakening is the first priority because it lets you smash obstacles that block side paths and hidden rooms. These areas contain upgrade materials, healing items, and sometimes optional bosses that drop unique swords. Unlocking this early means you can clear out every optional area in the opening chapters, which gives you a resource advantage that carries through the mid-game.
| Awakening Type | Primary Function | Best Time to Unlock | Why |
|---|---|---|---|
| Arm Awakening | Smash obstacles, open hidden paths | First | Unlocks exploration routes and materials |
| Leg Awakening | New movement abilities, dodge improvements | Second | Helps with boss dodging and traversal |
| Eye Awakening | Detect hidden objects, weak points | Third | Best when you know enemy layouts |
The Leg Awakening for Boss Fights
The Leg Awakening should come second because it improves your dodge and movement options, which are critical for the boss encounters that start appearing in chapter three. The game's stamina-depleting parries and strikes mean you cannot always block, so having a better dodge gives you an escape valve when your stamina is empty. Players who unlock the Leg Awakening before the first major boss report significantly fewer deaths, according to community discussions.
The Eye Awakening is last because its detection abilities are most useful when you already know the map layouts and want to find every secret. If you are following the Onimusha: Way of the Sword everything you need to know checklist, the order is Arm, Leg, Eye, and you should spend any leftover souls on stamina and health upgrades between awakenings. For a deeper breakdown of which swords pair best with each awakening, the weapon build guide ranks every blade by its synergy with the three trees.
Survival Strategies: Managing Stamina and Healing
The Onimusha: Way of the Sword how to survive question comes down to resource management more than combat skill, because the game is designed to punish greed. Stamina is the most important resource, and every action — attacking, parrying, dodging, and guarding — consumes it. When your stamina hits zero, you cannot parry or dodge, which means you are a sitting duck for the Genma's fastest attacks.
Here are the survival priorities that keep you alive through the campaign:
-
Never enter a boss fight with less than half stamina — the opening exchange usually requires two parries and a dodge, and you need the reserve to escape if the boss changes its pattern.
-
Keep two healing items in reserve at all times — the game's healing items are limited, and the linear-with-open-areas structure means you cannot always backtrack to a shop.
-
Use the guard stance only when you cannot dodge — because guarding drains stamina over time, while dodging costs a single burst, so the latter is almost always the better option.
-
Learn enemy attack tells before committing to parries — the game's parry window is generous, but only if you know when the attack is coming, so watch the enemy's weapon wind-up animation.
-
Steer enemies into walls with prolonged parries — this staggers them for longer and sets up free Issen counters, which means you spend less stamina overall.
The survival loop feeds into the combat loop: staying alive lets you practice parries, which builds your confidence, which lets you take more risks, which earns more souls, which funds more upgrades. Breaking this cycle by rushing into fights without stamina is the most common reason players die, according to community reports on the demo.
Healing Item Economy
The game's healing items are scarce, especially in the early chapters, so you need to treat them as a limited resource rather than a crutch. The best order to do things is to use healing only when your health drops below thirty percent, because the game's checkpoints are generous and you can often push through with low health to save items for boss fights.
| Healing Item | Amount Restored | Rarity | Best Use Case |
|---|---|---|---|
| Rice Ball | 20% health | Common | Between encounters |
| Herbal Remedy | 40% health | Uncommon | Mid-boss fight |
| Sacred Water | 100% health | Rare | Final boss phases |
| Oni Soul Fragment | 30% health + souls | Rare | Emergency recovery |
The table shows that you should save Sacred Water for the final boss phases, because the game's last encounters have multiple phases and you cannot restock mid-fight. The Oni Soul Fragment is the best value because it restores health and gives you souls, so use it when you are low on both resources.
Exploration Order and Hidden Paths
The game's structure is linear with open areas, which means you have some freedom in how you approach each chapter, but the best order to do things is to clear the main path first, then backtrack for secrets. This is because the main path unlocks new abilities — like the Arm Awakening's obstacle smashing — that let you reach areas you could not access on your first pass.
Chapter-by-Chapter Exploration Priorities
Each chapter has a main objective and several optional areas, and the order you tackle them affects your resource income. The general rule is to clear the main path until you hit a locked door or obstacle, then explore the optional areas to find the key or ability that unlocks it. This keeps you moving forward while still collecting everything.
| Chapter | Main Path Goal | Optional Area Reward | Priority |
|---|---|---|---|
| Chapter 1 | Reach the first shrine | Arm Awakening material | Main path first |
| Chapter 2 | Defeat the first mini-boss | Leg Awakening material | Optional first |
| Chapter 3 | Find the Oni Gauntlet | Eye Awakening material | Main path first |
| Chapter 4 | Confront Sasaki Ganryu | Unique sword blueprint | Optional first |
The pattern is that odd-numbered chapters favor main path first, while even-numbered chapters favor optional areas first, because the game alternates between teaching new mechanics and giving you space to use them. Players who follow this rhythm report smoother progression curves, as the gameplay guide notes in its progression breakdown.
The Oni Gauntlet Mystery
The Oni Gauntlet is the central mystery of the campaign, and the story trailer from Capcom's official channel emphasizes whether Musashi can free himself from its influence. The gauntlet grants power but seems to corrupt the user, and the game's story explores this tension through the rivalry with Sasaki Ganryu and the appearances of the Oni Lady, Ono no Takamura, and Izumo no Okuni.
The practical gameplay implication is that the gauntlet's power scales with your awakening upgrades, so unlocking all three awakenings before the final chapter makes the ending encounters significantly easier. The game's story is not connected to earlier Onimusha games or the Netflix series, according to the Wikipedia overview, so you do not need prior knowledge to follow the plot.
Frequently Asked Questions
What is the best order to do things in the first hour of Onimusha: Way of the Sword?
Complete the tutorial, unlock the Arm Awakening, spend souls on stamina upgrades, defeat the first mini-boss, and test the Break Issen mechanic before exploring side areas. This sequence builds your resource base and combat fundamentals before the difficulty ramps up in chapter three.
How do I survive boss fights with limited healing items?
Save healing items for when your health drops below thirty percent, and prioritize dodging over guarding because guarding drains stamina. Learn each boss's attack tells before committing to parries, and keep two healing items in reserve for emergency recovery during the final phase.
What are the best combat tips for triggering Issen counters?
Parry twice to build posture damage, then parry a third time to enter the Ki-en State, which buffs your attack speed and reduces stamina drain. Use the prolonged parry to steer enemies into walls for longer stun windows, then execute with the Issen counter for instant kills.
Which awakening should I unlock first in Onimusha: Way of the Sword?
The Arm Awakening is the best first choice because it lets you smash obstacles and reach hidden paths with upgrade materials. The Leg Awakening comes second for better dodging in boss fights, and the Eye Awakening is last because its detection abilities are most useful when you know the map layouts.
How long is the campaign and does the order of exploration matter?
The campaign runs about twenty hours, and the linear-with-open-areas structure means exploration order matters for resource income. Clear the main path first in odd-numbered chapters and optional areas first in even-numbered chapters to maintain a smooth progression curve without grinding.