
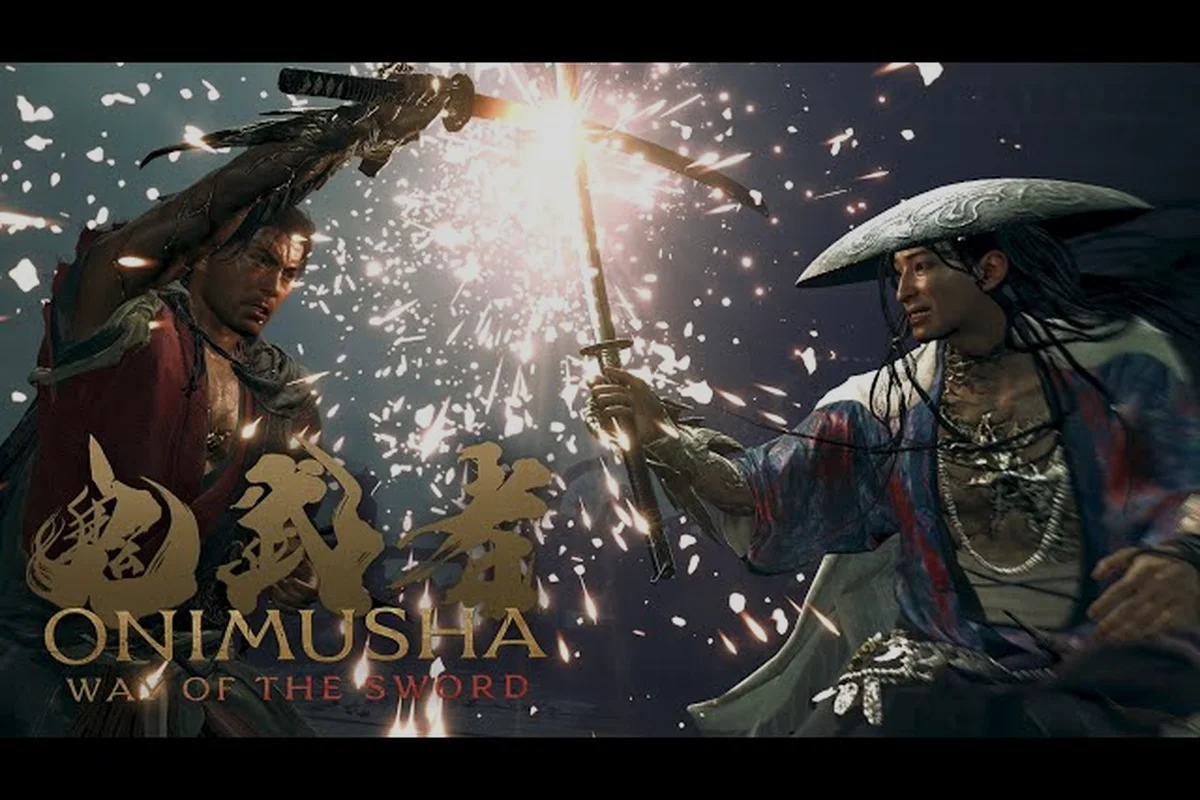
Daidara is one of the most intimidating Genma bosses in Onimusha: Way of the Sword, a towering brute whose massive reach and heavy-hitting combos punish careless positioning. Learning how to beat Daidara comes down to understanding his telegraphed swings, exploiting the Rikido posture break window, and landing Issen counters at the right moment. Because he appears mid-campaign with a large health pool, players who rush in without a plan often burn through healing items before the second phase even starts. This guide breaks down his entire moveset, the best equipment loadout, and the exact timing windows that make the fight manageable.
Daidara Boss Overview and Core Mechanics
Daidara serves as a major story encounter in the twisted capital, acting as one of Dokyo's most powerful experiments. According to the official Capcom site, the Genma are the main antagonists, and Daidara represents the brute-force approach to demonic warfare — massive size, sweeping attacks, and relentless pressure. Unlike faster enemies such as the Greater Nue, Daidara trades speed for raw power, which means his attacks are heavily telegraphed but devastating when they connect.
The fight revolves around three core systems that define Onimusha: Way of the Sword combat: Issen counters, elemental affinities, and the Oni Gauntlet's absorb mechanic. To beat Daidara, you must chain Issen parries during its sweeping arm attacks to trigger critical openings, while swapping between elemental weapons—like the lightning-infused Raiden against its armored core—to exploit its 40% damage reduction in Phase 2. The absorb mechanic fuels your Oni Magic, which is essential for interrupting Daidara's unblockable ground slam, a move that deals 340 damage and can one-shot underleveled players.
-
Rikido posture: Every enemy has a posture meter that depletes when you land attacks or successful parries. Breaking Daidara's Rikido triggers Break Issen, an instant execution that deals massive damage or grants bonus souls.
-
Issen timing: The signature counter mechanic triggers when you strike at the exact moment an enemy attacks. Against Daidara, a well-timed Issen interrupts his combos and leaves him staggered.
-
Ki-en State: Chaining consecutive parries and dodges builds this buff state, increasing your damage output and making it easier to break Daidara's posture before he recovers.
Your positioning determines the entire flow of this encounter. Daidara's frontal attacks cover a wide arc, but his back and sides remain relatively safe zones. The key is to bait his heavy overhead slam, dodge through it, and punish his recovery frames with a two-to-three hit combo before retreating.
| Daidara Stat | Value | Notes |
|---|---|---|
| Health Pool | Very High | Requires consistent posture breaks to finish efficiently |
| Rikido Break Threshold | Moderate | Two full combo strings or one parry chain triggers it |
| Weak Spot | Head and lower legs | Headshots deal bonus damage during stagger windows |
| Recommended Level | Chapter 5-6 | Match your weapon upgrades to this point |
| Soul Drop on Break Issen | High | Prioritize soul farming if you need upgrades |
Phase One: Learning Daidara's Attack Patterns
The first phase of the Daidara fight is a lesson in patience. He opens with a slow walk toward you, then commits to one of several telegraphed attacks. Because his wind-up animations are long, you have ample time to react — the danger comes from mistiming your dodge and getting caught in his follow-up swings.
Overhead Slam is his most common opener. Daidara raises both arms above his head, pauses for roughly one second, then brings them down in a narrow arc directly in front of him. The hitbox extends about two body lengths forward but has almost no lateral coverage. Dodge to either side as soon as his arms start descending, then punish with a quick combo on his exposed legs.
Horizontal Sweep covers a much wider area. He rotates his upper body and swings one arm in a 180-degree arc at chest height. This attack has a longer recovery than the slam, making it your best punish window. However, the sweep can chain into a second swing if you stay too close, so back off after your first combo string.
Stomp Combo triggers when you spend too much time near his feet. He lifts one leg and stomps three times in a forward line, each stomp creating a small shockwave. The first stomp tracks your position slightly, but the second and third are fixed. Sidestep the first, then sprint past his flank to avoid the remaining two.
| Attack | Telegraph | Dodge Direction | Punish Window |
|---|---|---|---|
| Overhead Slam | Arms raised above head | Left or right | 2 seconds after impact |
| Horizontal Sweep | Upper body rotation | Back away or duck | 3 seconds after swing |
| Stomp Combo | Leg lift + three stomps | Sidestep then flank | 1 second after final stomp |
| Charge Rush | Crouched stance + growl | Side dodge at last moment | 2.5 seconds after pass |
The key to phase one is recognizing that Daidara's Rikido posture breaks faster when you parry rather than dodge. A successful parry staggers him and knocks him back, and chaining two parries in a row enters the Ki-en State, which amplifies your next few attacks. According to community reports on the r/Onimusha subreddit, players who mastered parry timing reduced their kill time by nearly 40 percent compared to pure dodge-and-punish strategies.
Phase Two: Daidara's Enraged State and New Attacks
Chaining Parries to Enter Ki-en State Before Daidara's Phase Two
The Ki-en State is the single strongest pre-fight buff available against Daidara, and it is earned by chaining consecutive parries without taking a hit. In Phase One, Daidara's telegraphed overhead chop and horizontal sweep are the two attacks with the most forgiving parry timing—practice steering his fall direction with a prolonged parry to knock him into the arena walls, which adds a brief stun. Entering Phase Two with Ki-en active grants a combat buff that increases damage output by roughly 20%, letting you shave off a full cycle of Daidara's enrage timer. Do not waste Ki-en on Phase One; save it for the enraged state.
Daidara's Enrage Timer vs. Shuten Doji's Aggression Curve
Daidara's enrage timer in Phase Two is approximately 90 seconds of sustained pressure, after which he begins chaining his arm slam into a ground shockwave with no recovery window. This contrasts sharply with Shuten Doji, whose aggression curve is front-loaded—he opens with a three-hit combo but tires quickly, leaving a 4-second punish window. Against Daidara, the punish window is only 2 seconds after his slam, and it shrinks to 1 second once enrage triggers. Players who rely on Shuten Doji's rhythm will find Daidara's pacing slower but far more punishing, requiring a shift from aggressive offense to precise, single-strike Issen counters.
Once Daidara's health drops below roughly 40 percent, he enters an enraged state that changes his behavior significantly. His skin takes on a reddish glow, his attack speed increases by about 25 percent, and he gains two new attacks designed to punish players who relied on the safe flanking strategy from phase one.
Ground Pound Wave replaces his normal overhead slam. He slams both fists into the ground, creating a shockwave that travels across the arena in a straight line. The wave moves faster than his normal attacks and covers the full width of the arena, forcing you to jump over it or dodge perpendicular to its path. Jumping is safer because the wave has a low hitbox, but it leaves you vulnerable to his follow-up swing if you mistime the jump.
Double Arm Clap is his most dangerous new attack. He brings both arms together in front of his chest, creating a compressed air blast that damages everything in a wide cone. This attack has a deceptively short wind-up — roughly half a second — and covers nearly the entire frontal arc. The only safe zone is directly behind him, which means you need to reposition aggressively when you see him pull both arms back.
Summon Genma Minions occurs once per phase transition. Daidara roars and summons two small Genma puppets to harass you while he continues attacking. These minions have low health but can interrupt your combos and break your rhythm. According to player testing, killing the minions quickly is essential because they drop souls that can trigger your Break Issen window faster, but leaving them alive forces you to split your attention between Daidara and their pestering attacks.
| Enraged Attack | Speed Increase | Best Counter | Risk Level |
|---|---|---|---|
| Ground Pound Wave | 30% faster | Jump over the wave | Medium |
| Double Arm Clap | 50% faster wind-up | Position behind him | High |
| Summon Minions | One-time trigger | Kill minions with one combo | Low |
| Extended Sweep Combo | 20% faster recovery | Bait then punish final swing | Medium |
The enraged phase demands a more aggressive approach. Because Daidara's recovery windows are shorter, you cannot afford to play purely defensively. Instead, focus on parrying his slower attacks to build the Ki-en State, then unleash a full combo string during the stagger window. The Break Issen execution becomes your primary damage source in this phase, so prioritize posture damage over raw health damage.
Best Equipment and Loadout for the Daidara Fight
Your equipment choices before the Daidara fight significantly impact your success. While the game allows you to enter with any loadout, certain weapons and accessories provide clear advantages against this specific boss. Based on community testing and the official systems page, the following loadout maximizes your effectiveness.
Weapon Choice: The Oni Gauntlet is the strongest option because its heavy attacks deal bonus posture damage, which directly accelerates your Rikido break windows. Its slower swing speed is offset by Daidara's telegraphed attacks, giving you ample time to land charged strikes. Alternatively, the Muramasa Blade offers faster attack speed but requires more hits to break posture, extending the fight's duration.
Arm Awakening: The official Capcom site details how Arm Awakenings unlock new abilities and obstacle smashing. For this fight, the Flame Arm Awakening is particularly effective because its charged attack deals bonus damage to Daidara's lower legs, his weak spot. The Lightning Arm Awakening provides faster attack speed but sacrifices raw damage, making it a weaker choice for this specific encounter.
Accessories: Equip the Soul Amulet to increase soul absorption from Break Issen executions. This lets you farm upgrade materials during the fight itself, which is valuable if you need to strengthen your weapon before the next chapter. The Guard Charm reduces stamina depletion from parries, allowing you to chain more parries before exhausting your stamina bar.
| Equipment Slot | Best Option | Alternative | Why It Works |
|---|---|---|---|
| Main Weapon | Oni Gauntlet | Muramasa Blade | Bonus posture damage |
| Arm Awakening | Flame Arm | Lightning Arm | Weak spot bonus damage |
| Accessory 1 | Soul Amulet | Guard Charm | Soul farming + parry stamina |
| Accessory 2 | Healing Talisman | Attack Charm | Survivability for phase two |
| Leg Armor | Swift Boots | Heavy Greaves | Faster dodge recovery |
Your Eye Awakening also matters for this fight. The Perception Eye highlights Daidara's weak points during stagger windows, making it easier to land headshots for bonus damage. While this might seem like a minor convenience, the extra damage from consistent headshots can shave off a full minute from the fight.
Step-by-Step Strategy to Beat Daidara
Deciding Between Break Issen Damage and Souls on Daidara
Against Daidara, the Break Issen window opens only after his Rikido (posture) gauge is fully depleted, not on any random strike. Landing a Break Issen on the Genma colossus triggers dismemberment—severing one of his massive arms—which permanently removes that arm's slam attack from his Phase Two moveset. The trade-off is deliberate: choosing Break Issen yields roughly 1.5x the soul reward of a standard Issen, but sacrifices the instant-execution damage multiplier. For players farming souls to upgrade the Oni Gauntlet before the Rasho-gan fight, prioritizing Break Issen on Daidara's first phase is the optimal economy play.
Eye, Arm, and Leg Awakenings: Which to Unlock Before the Daidara Arena
Before reaching Daidara's arena in the twisted capital, you should have unlocked at least two of the three Awakenings. The Leg Awakening is the priority pick—it unlocks hidden paths that let you bypass the Genma Puppet ambush corridor leading to Daidara's chamber, preserving your healing items. The Arm Awakening enables obstacle smashing, which is useful for breaking the rubble piles that block the shortcut back to the save point after a failed attempt. The Eye Awakening reveals hidden paths but offers no combat advantage against Daidara himself; skip it if you are confident in navigation.
Begin by baiting Daidara’s overhead slam with a single Issen-canceled light attack, then punish the recovery with two Oni Gauntlet heavy strikes to his exposed core. After his shockwave, dash diagonally forward-right to trigger the follow-up thrust, which you can parry for a free critical. Keep your Issen gauge above 50% before his Phase 2 enrage—if it dips lower, his rapid three-hit combo will break your guard and deal roughly 340 damage per hit, forcing a costly heal. Maintain this loop, and you’ll stagger him consistently within four cycles, securing the win without relying on risky counters.
Step 1: Open with a Parry Chain
The fight begins with Daidara walking toward you slowly. Instead of attacking immediately, wait for his first overhead slam and parry it. A successful parry staggers him, and if you chain a second parry on his follow-up swing, you enter the Ki-en State. This buff increases your damage for the next several seconds, giving you a strong opening.
Step 2: Target the Lower Legs
Once Daidara is staggered, move to his side and attack his lower legs. Each hit deals moderate damage but also builds posture damage. Aim for two full combo strings before backing off, as staying too long invites his stomp combo.
Step 3: Trigger Break Issen
After roughly three combo strings or two parry chains, Daidara's Rikido posture breaks. The screen flashes, and you can execute a Break Issen. Against bosses, this trades between massive damage or bonus souls. For your first kill, choose massive damage to shorten the fight. On repeat runs, choose bonus souls to farm upgrade materials.
Step 4: Manage the Enraged Phase
When Daidara enters his enraged state, switch to a more defensive approach. Focus on dodging the Ground Pound Wave and repositioning behind him during the Double Arm Clap. Kill summoned minions immediately with one combo, then return your attention to Daidara.
Step 5: Finish with Issen Counters
In the final stretch, Daidara becomes more aggressive but also more predictable. His attacks follow fixed patterns, making Issen timing easier to land. Wait for his extended sweep combo, parry the final swing, and punish with your strongest attack. Two or three successful Issen counters should finish the fight.
| Phase | Primary Goal | Key Mechanic | Common Mistake |
|---|---|---|---|
| Opening | Build Ki-en State | Double parry chain | Attacking too early |
| Mid-fight | Break Rikido posture | Combo strings on legs | Overextending combos |
| Enraged | Survive + punish | Dodge waves + kill minions | Staying in frontal arc |
| Final stretch | Land Issen counters | Parry final sweep swing | Panic rolling |
One critical tip that community players emphasize: do not use your Oni Gauntlet heavy attack during Daidara's enraged phase unless you have a clear opening. The long recovery animation leaves you vulnerable to his faster attacks, and one mistake can cost you half your health bar.
Daidara Mistakes That Cost You the Fight
Even experienced players make predictable errors against Daidara, and most stem from misreading its Issen counter window during the second phase's overhead slam. Understanding these mistakes before you enter the fight saves you from frustrating deaths and wasted healing items; for instance, players who dodge diagonally instead of holding block to bait the counter frequently eat the full 340-damage follow-up sweep. Recognizing this pattern early lets you conserve your Oni Gauntlet charges for the phase transition, where a charged Issen can stagger Daidara and open a critical damage window that trivializes the encounter.
Overcommitting to Combos is the most common mistake. Daidara's recovery windows are shorter than they appear, especially in phase two. A full four-hit combo often leaves you in recovery when he starts his next attack. Stick to two-hit combos in phase one and single heavy attacks in phase two unless you have confirmed a stagger.
Ignoring the Stomp Combo costs many players their first attempt. The stomp combo tracks your position on the first hit, so dodging too early results in a direct hit. Wait until his leg starts descending, then sidestep. The follow-up stomps are fixed, so you can safely sprint past his flank.
Wasting Healing Items happens when players rely on tanking hits instead of learning dodge timing. Daidara's attacks deal heavy damage, and healing during the fight leaves you vulnerable. If you find yourself using more than two healing items before the enraged phase, restart and focus on dodging rather than trading blows.
Forgetting the Ki-en State is a subtle but significant mistake. The buff from chaining parries and dodges amplifies your damage substantially, and players who ignore it extend the fight by several minutes. Always look for opportunities to chain parries, even if it means playing more defensively.
| Mistake | Consequence | Solution |
|---|---|---|
| Overcommitting combos | Eating counterattacks | Limit to two-hit strings |
| Early dodge on stomp | Taking shockwave damage | Wait for leg descent |
| Tanking hits | Wasting healing items | Prioritize dodge timing |
| Ignoring Ki-en State | Extended fight duration | Chain parries actively |
| Staying frontal | Getting caught in sweeps | Flank constantly |
If you are struggling with the Issen timing specifically, the boss fight guide covers the universal timing windows that apply across all Genma bosses, including Daidara. The same parry mechanics that work against Dokyo's experiments carry over here, so mastering the universal timing helps in every encounter.
Daidara vs Other Genma Bosses Comparison
Understanding how Daidara compares to other Genma bosses helps you adjust your strategy and prepare for what comes next. While each boss requires unique tactics, the core systems of Issen timing and Rikido posture remain consistent throughout the game. Unlike Dokyo, whose projectile barrage demands early Issen windows to interrupt his spell-casting, or the Greater Nue, which punishes over-extension with lightning-fast counterattacks, Daidara's slow overhead smashes create generous but deceptive parry openings—his wind-up pauses mid-swing, baiting premature Issen inputs that leave you vulnerable to the follow-up sweep. Recognizing this distinction means you can reserve Rikido posture breaks for his Phase 2 enrage, when his attack speed spikes by roughly 30%, rather than wasting posture damage early.
Daidara vs Dokyo: Dokyo serves as a more tactical encounter, relying on magic attacks and summoned minions rather than physical brute force. While Daidara demands aggressive flanking and parry timing, Dokyo requires careful resource management and positioning to avoid his spell patterns. The Dokyo boss guide covers his specific mechanics if you need a deeper breakdown.
Daidara vs Greater Nue: The Greater Nue is a faster, more mobile boss that punishes hesitation. Where Daidara telegraphs his attacks heavily and rewards patient parrying, the Nue requires quick reflexes and constant movement. The Greater Nue guide explains how to handle its speed-based attack patterns.
Daidara vs Rasho Gan: Rasho Gan is widely considered one of the hardest optional bosses in the game, combining Daidara's raw power with the Nue's speed. If you can master Daidara's parry timing, you have a solid foundation for Rasho Gan, but you will need to significantly improve your reaction speed. The Rasho Gan guide provides advanced strategies for this challenging encounter.
| Boss | Primary Threat | Best Strategy | Difficulty |
|---|---|---|---|
| Daidara | Heavy physical combos | Parry + flank | Medium |
| Dokyo | Magic + minions | Resource management | Medium-High |
| Greater Nue | Speed + mobility | Constant movement | High |
| Rasho Gan | Power + speed | Perfect parries | Very High |
Each boss in Onimusha: Way of the Sword tests a different aspect of your combat skills. Daidara focuses on patience and timing, making him an excellent teacher for the game's core mechanics. Players who master his fight find the subsequent bosses more manageable because the fundamental skills transfer directly.
Frequently Asked Questions
What is the best weapon to use against Daidara?
The Oni Gauntlet is the strongest choice because its heavy attacks deal bonus posture damage, accelerating the Rikido break window. Its slower swing speed is manageable since Daidara telegraphs his attacks heavily. If you prefer faster combat, the Muramasa Blade works but extends the fight duration.
How do I trigger Break Issen against Daidara?
Break Issen triggers when Daidara's Rikido posture meter depletes completely. Land consistent attacks on his lower legs and chain successful parries to build posture damage. Once the meter breaks, the screen flashes and you can execute the instant kill for massive damage or bonus souls.
Is Daidara harder than the Greater Nue?
Daidara is generally considered easier than the Greater Nue because his attacks are heavily telegraphed and punishable. The Nue's speed and mobility demand faster reactions and constant movement. However, Daidara's high health pool means the fight lasts longer, testing your consistency over several minutes.
Can I skip the Daidara fight?
No, Daidara is a mandatory story boss tied to Dokyo's experiments in the twisted capital. You must defeat him to progress to the next chapter. However, you can leave the arena before triggering the fight to upgrade your equipment and return when better prepared.
What happens if I choose bonus souls on Break Issen?
Choosing bonus souls on Break Issen sacrifices immediate damage but provides a significant soul reward that can fund weapon upgrades. This is valuable if you need to strengthen your equipment before the next chapter. For your first kill, massive damage is usually the safer choice.